Searching for “airplane jumping near me” is the first step thousands of Americans take each year before experiencing one of life’s most exhilarating adventures. Whether you’re looking to cross skydiving off your bucket list, surprise someone with an unforgettable gift, or simply satisfy that burning curiosity about what it’s like to jump from a plane at 14,000 feet, finding the right local drop zone makes all the difference.
- Quick Answer Box
- Table of Contents
- How to Find Airplane Jumping Facilities Near You
- Understanding Different Types of Skydiving Experiences
- What to Expect: Your First Airplane Jump Step-by-Step
- Before You Arrive: Preparation Checklist
- Arrival and Check-In (30-45 Minutes)
- Ground School Training (20-30 Minutes)
- Gear Up and Meet Your Instructor (15-20 Minutes)
- The Aircraft Ride (15-25 Minutes)
- The Exit and Freefall (45-60 Seconds)
- Parachute Deployment and Canopy Ride (5-7 Minutes)
- Landing Approach and Touchdown
- After Your Jump (30-60 Minutes)
- Comparing Costs: Local Drop Zone Pricing Guide
- Best Skydiving Locations by U.S. Region
- Essential Gear and Equipment Recommendations
- Safety Standards and What to Verify Before Booking
- USPA Certification: Your Primary Safety Filter
- Instructor Certifications to Look For
- Equipment Standards and Maintenance
- Safety Records and Statistics
- Pre-Jump Safety Briefing Red Flags
- Weather and Operational Limits
- Insurance and Liability
- Emergency Procedures and Backup Systems
- Questions to Ask Before Booking
- Medical Considerations and Restrictions
- What to Do If You Witness Safety Concerns
- Booking Your Jump: Insider Tips and Best Practices
- Best Times to Schedule Your Jump
- How Far in Advance to Book
- Finding Deals and Discounts
- Gift Certificates for Others
- Booking for Groups and Special Events
- Weather Contingency Planning
- What to Bring vs. What to Leave Home
- Preparing Friends and Family
- Technical Booking Platforms
- Managing Expectations
- Post-Booking: The Days Before Your Jump
- Day-Of Success Tips
- Frequently Asked Questions
- Q: How do I find airplane jumping facilities near my location?
- Q: How much does airplane jumping cost for first-timers?
- Q: Is airplane jumping safe for beginners?
- Q: What weather conditions cancel airplane jumping?
- Q: What are the weight limits for airplane jumping?
- Q: How long does the entire airplane jumping experience take?
- Q: Can I bring my own GoPro camera on the jump?
- Q: What should I wear for my first airplane jump?
- Q: How old do I need to be to go airplane jumping?
- Q: What happens if I’m too scared to jump when we reach altitude?
- Q: Do I need any previous experience or training before my first jump?
- Q: Can I eat before airplane jumping, or will I get sick?
- Q: What’s the difference between tandem and solo skydiving?
- Q: How high do you jump from, and how long is the freefall?
- Q: Will my ears pop during airplane jumping?
- Q: Can I go airplane jumping if I’m afraid of heights?
- Conclusion
In 2026, the United States boasts over 250 USPA-certified skydiving centers spanning all 50 states, making airplane jumping more accessible than ever. From coastal California to the mountains of Colorado, from the plains of Kansas to the beaches of Florida, there’s likely a professional skydiving facility within a two-hour drive of your location. According to the United States Parachute Association, over 3.6 million jumps occurred at American drop zones in 2025, with first-time tandem skydiving growing by 34% compared to pre-pandemic levels.
This comprehensive guide helps you find airplane jumping facilities near you, understand what to expect, compare costs and packages, and choose the best option for your first jump or hundredth. You’ll discover insider tips for booking, seasonal considerations, safety standards to verify, and equipment recommendations that can enhance your experience. By the end of this article, you’ll be ready to book your jump with confidence and preparation.
Quick Answer Box
Finding Airplane Jumping Near You:
- Search Tool: Use USPA.org’s Drop Zone Locator to find certified facilities by state and city
- Average Cost: $200-$300 for first-time tandem jumps (varies by location and altitude)
- Booking Timeline: Reserve 1-4 weeks in advance during peak season (May-September)
- What’s Included: Aircraft ride, professional instructor, all equipment, 45-60 seconds freefall, 5-7 minute parachute ride
- Add-Ons Worth It: Video packages ($100-$150), higher altitude jumps (+$50-$75), same-day photo delivery
- Best Times: Early morning (7-10am) offers calmest winds and highest completion rates
Table of Contents
- How to Find Airplane Jumping Facilities Near You
- Understanding Different Types of Skydiving Experiences
- What to Expect: Your First Airplane Jump Step-by-Step
- Comparing Costs: Local Drop Zone Pricing Guide
- Best Skydiving Locations by U.S. Region
- Essential Gear and Equipment Recommendations
- Safety Standards and What to Verify Before Booking
- Booking Your Jump: Insider Tips and Best Practices
- Frequently Asked Questions
How to Find Airplane Jumping Facilities Near You
Finding reputable airplane jumping facilities near your location is easier than ever with modern search tools and certification databases. Here’s your step-by-step process for locating the best options in your area.
Use the USPA Drop Zone Locator
The United States Parachute Association maintains the most comprehensive and reliable directory of certified skydiving centers. Visit USPA.org/Find-A-Dropzone and enter your city, state, or zip code to see all USPA-certified facilities within your search radius.
What the USPA Locator Shows:
- Distance from your location
- Contact information and website links
- Facility ratings and certifications
- Available services (tandem, AFF, solo jumping)
- Operating hours and seasonal schedules
USPA certification indicates the drop zone meets strict safety standards, maintains proper insurance, employs certified instructors, and follows equipment maintenance protocols. This is your first and most important filter.
Google Maps and Local Search
Searching “airplane jumping near me” or “skydiving near me” on Google Maps provides immediate visual results showing nearby facilities with reviews, photos, and directions. However, always cross-reference Google results with the USPA directory to ensure the facility is currently certified.
Advanced Google Search Tips:
- “Tandem skydiving near [your city]”
- “Best skydiving [your state]”
- “Airplane jumping [nearest major city]”
- “First time skydiving [your location]”
Review Platforms and Social Media
Check multiple review sources to get accurate facility assessments:
Recommended Review Sites:
- Google Reviews (most comprehensive)
- Yelp (detailed experience descriptions)
- TripAdvisor (good for tourist areas)
- Facebook business pages (recent photos and videos)
- Instagram hashtags (#SkydivingNearMe, #[FacilityName])
Look for patterns in reviews rather than individual complaints. Red flags include multiple mentions of safety concerns, equipment issues, or unprofessional behavior. Positive indicators include praise for instructor quality, clear communication, and smooth operations.
Regional Skydiving Associations
Many states have regional skydiving associations that maintain local directories:
- California: CaliforniaSkydiving.com
- Florida: FloridaSkydivingCenter.com
- Texas: TexasSkydiving.com
- Northeast: NortheastSkydiving.org
These regional resources often include special promotions, group discounts, and seasonal events not advertised nationally.
Distance and Travel Time Considerations
Most Americans live within 100 miles of a USPA-certified drop zone. However, quality and experience level vary significantly. Consider traveling 1-2 hours for a highly-rated facility rather than choosing the closest option with mediocre reviews.
Optimal Distance Guidelines:
- Within 50 miles: Ideal for your first jump and frequent visits
- 50-100 miles: Acceptable for special occasions or better facilities
- 100-150 miles: Consider for destination skydiving experiences
- 150+ miles: Only for premier facilities or specific bucket-list locations
Understanding Different Types of Skydiving Experiences
When searching for airplane jumping near you, you’ll encounter several different experience types. Understanding these options helps you choose the right first experience and progression path.
Tandem Skydiving: Best for First-Time Jumpers
Tandem skydiving is the most popular introduction to airplane jumping, accounting for over 85% of first-time jumps in the United States. You’re securely harnessed to a certified tandem instructor who manages all technical aspects of the jump.
Tandem Jump Specifications:
- Altitude: 10,000-18,000 feet (most common: 14,000 feet)
- Freefall Duration: 30-60 seconds depending on altitude
- Canopy Time: 5-7 minutes
- Training Required: 20-30 minutes ground school
- Minimum Age: 18 years (16 with parental consent in some states)
- Weight Limit: 200-240 lbs (varies by facility)
What Makes Tandem Ideal:
- Minimal training requirement
- Professional handles all technical decisions
- Focus on experiencing rather than technique
- Immediate gratification—jump same day you book
- Perfect for testing if you want to continue skydiving
Cost Range: $200-$350 depending on altitude and location
Recommended First-Timer Package: Check out the Sportlite Tandem Skydiving Package available through many drop zones, which includes your jump plus video documentation.
Accelerated Freefall (AFF): Learning to Jump Solo
AFF represents the fastest path to solo skydiving certification. This intensive program teaches you to jump independently through a series of progressively challenging levels.
AFF Program Structure:
- Total Jumps Required: 7 minimum (25 for full A-License)
- Ground School: 6-8 hours comprehensive training
- Cost: $1,500-$3,000 complete program
- Timeline: 2-4 weeks if jumping regularly
- Instructor Support: Initially two instructors, gradually reduced
AFF Progression:
- First jump with two instructors maintaining contact
- Practice stability and altitude awareness
- Learn to control turns and movement
- Deploy your own parachute under supervision
- Solo jumps with instructor observation
- Advanced maneuvers and emergency procedures
- Final evaluation and certification
AFF makes sense if you plan multiple jumps or want to develop serious skydiving skills. After certification, per-jump costs drop to $25-$50 versus $200-$300 for tandem jumps.
Essential AFF Gear Package: Consider investing in the SkyPro Altimeter and Audible Combo if you’re serious about progressing through AFF certification.
Indoor Skydiving: Wind Tunnel Experience
Indoor skydiving facilities use vertical wind tunnels to simulate freefall without airplanes or parachutes. This offers a risk-free introduction to body flight and is increasingly popular as a standalone experience or tandem jump preparation.
Indoor Skydiving Details:
- Flight Time: Packages from 2-10 minutes
- Cost: $60-$150 depending on flight time
- Age Minimum: Typically 3-4 years old
- Weight Limit: More generous than outdoor jumping
- Skills Developed: Body positioning, stability control, basic maneuvers
When Indoor Makes Sense:
- Testing interest before committing to outdoor jump
- Developing skills before AFF certification
- Physical limitations preventing outdoor jumping
- Family experiences including young children
- Weather-independent activity option
Major indoor facilities include iFLY (50+ locations nationwide), SkyVenture, and Paraclete XP. Search “indoor skydiving near me” to find your closest wind tunnel.
Static Line and IAD Jumping
Static line and Instructor-Assisted Deployment (IAD) are older training methods still offered at some facilities. These involve jumping from lower altitudes (3,000-5,000 feet) with automatic parachute deployment.
Why Static Line Is Less Common:
- Limited freefall experience (3-5 seconds maximum)
- More physically demanding exits
- Slower progression to advanced skills
- Less relevant to modern skydiving techniques
Most experts recommend tandem or AFF over static line for modern first-time jumpers.
Specialty Jumps: HALO, HAHO, and Formation
Advanced jumpers may seek specialty experiences:
- HALO (High Altitude, Low Opening): Jump from extreme altitudes (18,000-30,000 feet) requiring oxygen
- HAHO (High Altitude, High Opening): Deploy immediately for extended canopy flight
- Formation Skydiving: Coordinated group jumps creating aerial formations
These require significant experience and specialized training but represent exciting progression opportunities.
What to Expect: Your First Airplane Jump Step-by-Step
Understanding the complete process from arrival to landing reduces anxiety and helps you maximize your airplane jumping experience.
Before You Arrive: Preparation Checklist
24-48 Hours Before Your Jump:
- Check Weather Updates: Call the drop zone or check their website/social media for weather-related updates. Wind speeds above 20mph typically ground jumping operations.
- Eat a Normal Meal: Contrary to popular belief, jumping on an empty stomach increases nausea risk. Eat your regular breakfast or lunch 1-2 hours before arrival.
- Hydrate Properly: Drink plenty of water the day before. Dehydration increases altitude sickness risk and slows recovery.
- Review Restrictions: No alcohol 8 hours before jumping, no recreational drugs 24 hours prior, no scuba diving within 24 hours.
- Prepare Your Outfit:
- Comfortable athletic clothes (avoid loose clothing)
- Lace-up athletic shoes (no sandals, boots, or slip-ons)
- Long sleeves and pants recommended for cooler temperatures at altitude
- Remove all jewelry
- Secure long hair
What to Bring:
- Valid government-issued ID
- Credit card or cash for add-ons
- Comfortable clothes for waiting (bring layers)
- Sunscreen and sunglasses
- Water bottle
- Prescription glasses (if needed—contacts require goggles)
What to Leave at Home:
- GoPro or personal cameras (facilities provide professional video)
- Expensive jewelry or watches
- Loose clothing or accessories
- Expectations of rigid schedules
Recommended Pre-Jump Reading: Consider the Skydiving Safety and Training Manual to familiarize yourself with safety protocols and reduce first-jump anxiety.
Arrival and Check-In (30-45 Minutes)
Plan to arrive 30 minutes before your scheduled time. The check-in process includes:
Step 1: Paperwork and Waivers You’ll sign liability waivers acknowledging inherent risks. Read carefully but understand that reputable facilities maintain excellent safety records. These documents are standard industry practice and legally required.
Step 2: Weight Verification Facilities weigh all tandem participants to ensure proper parachute sizing and safety parameters. Be honest about your weight when booking—surprises at check-in can result in cancellations.
Step 3: Add-On Selection This is when you’ll decide on video packages, altitude upgrades, and other enhancements:
- Video Packages: $100-$150 (highly recommended for first jumps)
- Altitude Upgrade: 14,000 to 18,000 feet (+$50-$75)
- Same-Day Video Delivery: +$25-$50
- Professional Photo Prints: $20-$40
Pro Tip: The SanDisk 128GB Extreme SD Card ensures you have storage for transferring your jump video to personal devices.
Ground School Training (20-30 Minutes)
Your tandem instructor or designated trainer conducts a brief but comprehensive training session covering:
Training Topics:
- Exit Procedure: How to position your body leaving the aircraft
- Freefall Position: Arching your back, extending limbs
- Communication Signals: Instructor will tap your shoulders for positioning cues
- Parachute Deployment: What to expect during deployment (5-6 second transition)
- Landing Approach: Lifting your legs for instructor-controlled touchdown
- Emergency Procedures: Backup systems and contingencies
Practice Exercises:
- Ground-based body position practice
- Mock exit from platform or aircraft mock-up
- Landing position rehearsal
- Equipment overview and harness fitting
Take this training seriously even though tandem requires no prior experience. Understanding what happens next reduces anxiety and improves your actual jump experience.
Gear Up and Meet Your Instructor (15-20 Minutes)
Equipment Fitting: You’ll be fitted with:
- Jumpsuit: Protects your clothes and reduces wind resistance
- Harness: The tandem attachment system connecting you to your instructor
- Goggles: Protects eyes during 120mph freefall
- Altimeter: Visual altitude reference (your instructor monitors this)
- Sometimes: Gloves, helmet, or additional weather protection
Instructor Introduction: Meet the certified tandem instructor who will accompany you on your jump. This is your opportunity to ask any final questions and establish rapport. Your instructor will:
- Review their certification and experience level
- Explain their specific procedures and preferences
- Answer any last-minute questions
- Final harness check and adjustment
Recommended Accessory: The GoPro HERO12 Black Bundle is what most professional skydiving videographers use—if you continue jumping, it’s a worthwhile investment for personal documentation.
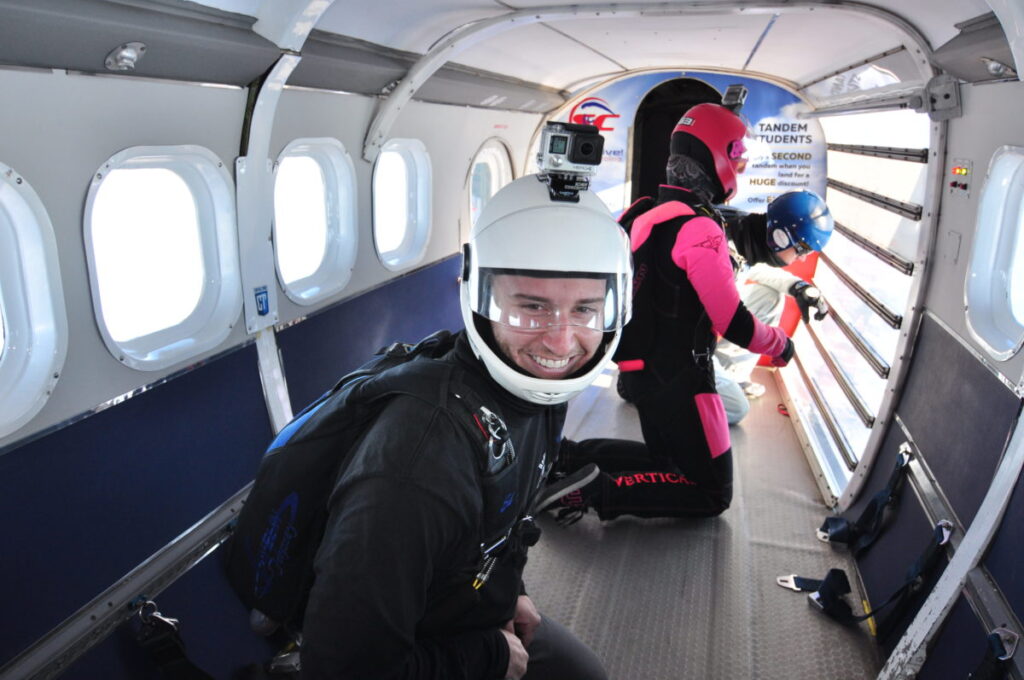
The Aircraft Ride (15-25 Minutes)
The climb to altitude is often the most nerve-wracking part for first-timers, but it’s also when excitement builds.
Aircraft Types:
- Cessna 182: Small, holds 3-4 jumpers
- Twin Otter: Medium, holds 15-20 jumpers (most common)
- King Air or Caravan: Larger turbine aircraft, faster climb
What Happens During Ascent:
- 0-5,000 feet: Normal climb, conversation possible
- 5,000-10,000 feet: Engine noise increases, pre-jump preparations begin
- 10,000-14,000 feet: Final equipment checks, instructor attachments secured
- Final approach: Door opens at 1,000 feet before jump altitude
Managing Nerves During the Climb:
- Focus on breathing (4-count inhale, 6-count exhale)
- Look around at other jumpers—their excitement is contagious
- Trust your training and instructor experience
- Remember: hundreds of thousands of successful tandem jumps occur annually
Your instructor will connect your harness to their rig during the final few thousand feet of ascent, triple-checking all attachment points.
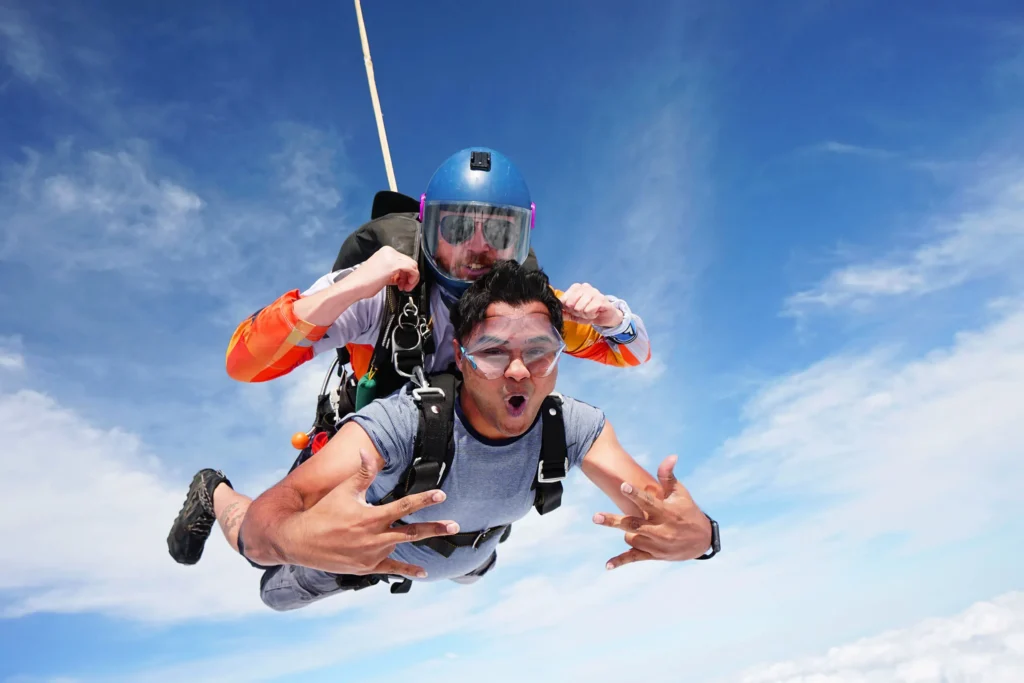
The Exit and Freefall (45-60 Seconds)
This is the moment you’ve been waiting for—exiting the aircraft and experiencing freefall.
Exit Sequence:
- Your instructor positions you at the door
- You arch your back and tip your head backward (as trained)
- Three-count: “Ready, Set, GO!”
- Sudden rush of wind and sensory overload
- 2-3 seconds of transition to stable freefall
Freefall Characteristics:
- Speed: Accelerate to 120 mph terminal velocity within 10 seconds
- Sound: Incredibly loud wind noise (conversation impossible)
- Sensation: Unlike anything experienced in normal life—not a “falling” feeling
- Duration: 45-60 seconds depending on exit altitude
- Temperature: Significantly colder at altitude (can be 30-40°F cooler than ground)
What You’ll Experience:
- Adrenaline surge unlike anything else
- Visual perspective of Earth from 2+ miles up
- Instructor’s hand signals for body position corrections
- Videographer (if you purchased video package) flying nearby filming
- Time distortion—seconds feel longer during freefall
Common First-Timer Reactions:
- 60% describe it as “flying” rather than falling
- 30% experience temporary sensory overload
- 10% get teary eyes from wind (normal)
- 95% want to do it again immediately upon landing
Parachute Deployment and Canopy Ride (5-7 Minutes)
Around 5,000-6,000 feet, your instructor deploys the parachute, transitating from freefall to gentle floating descent.
Deployment Sequence:
- Instructor signals deployment (tap on shoulder or arm)
- Drogue chute deploys (small stabilizing parachute)
- 3-5 seconds of deceleration
- Main parachute opens with noticeable but comfortable jolt
- Sudden quiet after the roar of freefall
Under Canopy:
- Descent Rate: 1,000 feet per minute (gentle and controlled)
- Conversation: Finally possible—instructor can point out landmarks
- Maneuvers: Your instructor may perform gentle turns and spirals
- Participation: Many instructors offer control to tandem participants
- Views: Unobstructed panoramic perspectives of the landscape
- Duration: 5-7 minutes depending on altitude and winds
This is when many first-timers process what just happened and really start enjoying the experience. The parachute ride often becomes people’s favorite part of the jump.
Canopy Flight Options: Standard descent provides gentle, scenic ride. If requested and conditions allow, instructors can perform more dynamic maneuvers including spirals and faster turns for added excitement.
Landing Approach and Touchdown
Your instructor manages the entire landing sequence, but you’ll need to follow specific body positioning for safe touchdown.
Landing Preparation (Final 500 Feet):
- Instructor explains upcoming landing sequence
- Radio communication with ground crew (standard procedure)
- Final approach into designated landing area
- Wind check and landing direction assessment
Landing Position:
- Lift your legs to 90-degree angle
- Keep them elevated until instructor signals
- Instructor’s legs touch first, absorbing impact
- Slide landing on buttocks (most common) or walk landing on feet
Post-Landing:
- Quick gear check and harness disconnection
- Ground crew assistance
- Walk back to facility (usually 50-200 yards)
- Immediate adrenaline high and sense of accomplishment
Most first-timers describe the landing as surprisingly gentle and anticlimactic after the intensity of freefall.
After Your Jump (30-60 Minutes)
Immediate Post-Jump Activities:
- Return equipment (jumpsuit, goggles, harness)
- Video preview and purchase (if you didn’t pre-buy)
- Certificate or completion documentation
- Debrief with instructor (optional but recommended)
- Share experience with other jumpers and staff
Video Delivery Options:
- Immediate USB Transfer: Available at most facilities
- Digital Download: Email link within 2-24 hours
- Cloud Storage: Upload to Dropbox or Google Drive
- Social Media: Edited clips optimized for Instagram/Facebook
Physical After-Effects:
- Adrenaline high lasting 2-6 hours
- Mild muscle soreness (from arching in freefall)
- Increased appetite
- Difficulty focusing on mundane tasks
- Desire to share experience with everyone you know
Certification Opportunities: This is when facilities discuss AFF programs and progression paths if you’re interested in continuing skydiving.
Comparing Costs: Local Drop Zone Pricing Guide
Understanding airplane jumping costs helps you budget appropriately and identify the best value options near you.
National Average Pricing (2026)
Standard Tandem Jump Packages:
| Altitude | Average Cost | Freefall Time | Best For |
|---|---|---|---|
| 10,000 feet | $180-$220 | 30 seconds | Budget-conscious first-timers |
| 13,000 feet | $220-$260 | 45 seconds | Most popular option |
| 14,000 feet | $240-$280 | 50 seconds | Standard first-time experience |
| 18,000 feet | $290-$350 | 60+ seconds | Maximum freefall experience |
Regional Price Variations:
- West Coast (CA, WA, OR): 10-20% above national average
- East Coast (NY, MA, FL): 5-15% above national average
- Midwest (OH, IL, MI): At or slightly below national average
- South (TX, GA, NC): 5-10% below national average
- Mountain West (CO, UT): 10-15% above average (premium views)
Video and Photography Packages
Professional documentation significantly enhances your experience and provides shareable content.
Standard Video Package ($100-$150):
- Helmet-mounted camera footage
- Edited 3-5 minute video
- 15-25 still photos
- Digital delivery (download or USB)
- Music overlay and basic editing
Premium Video Package ($150-$200):
- Multiple camera angles
- Professional videographer (separate jumper filming you)
- Extended raw footage
- Advanced editing with multiple music options
- High-resolution photos (50-100 images)
- Same-day delivery
- Social media-optimized clips
Outside Videographer Only ($180-$250):
- Dedicated jumper films your entire experience
- No instructor helmet cam
- More dynamic angles and perspectives
- Better visual quality
- Ideal for social media content
Is Video Worth It? 98% of first-time jumpers who purchase video packages report no regrets, while 75% of those who skip it wish they had documented their first jump. For most people, this is a once-in-a-lifetime experience worth capturing.
Recommended Storage Solution: The SanDisk 256GB Ultra USB Flash Drive provides ample storage for multiple jump videos and transfers files quickly between devices.
Add-Ons and Upgrades
Common Additional Costs:
- T-Shirt or Merchandise: $20-$35
- Professional Photo Prints: $15-$40
- Digital Photos Only: $30-$50
- Rush Video Edit: $25-$50 (same-day delivery)
- Altitude Upgrade: $50-$75 (10,000 to 14,000 feet)
- Weekend Premium: $20-$40 (some facilities charge more on weekends)
- Tip for Instructor: $20-$50 (customary but not required)
Group Discounts and Packages
Most facilities offer discounts for multiple jumpers booking together:
Typical Group Pricing:
- 2-3 people: 5% discount per person
- 4-6 people: 10% discount per person
- 7-10 people: 15% discount per person
- 11+ people: 15-20% discount (requires advance coordination)
Special Packages:
- Birthday Packages: Often include decorations, group coordination, celebration area
- Bachelor/Bachelorette: Customized experiences with photo ops and certificates
- Corporate Team Building: Volume discounts plus team-specific programming
Hidden Costs to Consider
Potential Additional Expenses:
- Travel to drop zone: Gas, tolls, parking fees
- Accommodation: If traveling distance requires overnight stay
- Meals: Most jumps take 3-4 hours total—plan for meals
- Weather delay contingency: Multiple-day availability if weather cancels first attempt
- Weight fees: Some facilities charge extra for tandem participants over 200 lbs
- Gear rental: Usually included, but verify beforehand
AFF Certification Program Costs
If you decide to pursue skydiving certification after your first tandem jump:
Complete AFF Program ($1,500-$3,000):
- Ground school training (6-8 hours): $200-$300
- Level 1-7 jumps with instructors: $1,200-$2,200
- Equipment rental: Usually included in per-jump cost
- Course materials and manuals: $50-$100
- USPA membership: $79 annual (required)
Post-Certification Per-Jump Costs:
- Jump ticket (aircraft ride to altitude): $25-$35
- Rig rental (parachute system): $15-$25
- Total per jump: $40-$60
After 25-30 jumps, certification becomes more economical than tandem jumping.
Starter Gear Package: If you decide to get seriously into skydiving, consider the Cookie G4 Skydiving Helmet and L&B Viso II+ Altimeter as your first personal equipment investments.
Money-Saving Strategies
How to Reduce Costs:
- Book Mid-Week: Many facilities offer 10-15% discounts Monday-Thursday
- Off-Season Jumping: Some regions discount during slower months
- Skip Video First Time: Consider videoing second jump instead (controversial but saves $100-$150)
- Lower Altitude: 10,000-foot jumps cost $40-60 less than 14,000-foot options
- Group Bookings: Bring friends for automatic discounts
- Social Media Deals: Follow local drop zones for promotional codes
- Gift Certificates: Watch for holiday sales (Black Friday, Christmas)
- Groupon and Deal Sites: Occasional significant discounts (verify USPA certification)
When NOT to Cheap Out:
- Never compromise on facility safety record
- Video documentation is usually worth the cost
- Don’t skip altitude for nominal savings ($50 difference is insignificant compared to experience)
- Avoid uncertified operators even if significantly cheaper
Comparing Value: What You’re Really Paying For
The cost of airplane jumping includes much more than just the experience:
Your Cost Covers:
- Aircraft operation and fuel (significant expense)
- Certified instructor expertise (years of training)
- Equipment maintenance and replacement
- Comprehensive insurance coverage
- Facility operations and overhead
- Safety protocols and redundant systems
- Customer service and scheduling coordination
- Ground crew and support staff
When comparing facilities, don’t choose based on price alone. The cheapest option may cut corners on equipment quality, instructor experience, or safety protocols.
Best Skydiving Locations by U.S. Region
Different regions offer unique airplane jumping experiences based on geography, climate, and local drop zone culture.
West Coast: California, Oregon, Washington
The West Coast provides year-round jumping opportunities with diverse landscapes from beaches to mountains.
Top California Drop Zones:
Skydive Perris (Perris, CA)
- Distance from LA: 90 minutes
- Specialty: World-class training facility, competition-focused
- Altitude: Up to 18,000 feet
- Cost: $220-$350
- Best For: Serious progression, large formation jumps
- Unique Feature: Tunnel adjacent to drop zone for skill development
Skydive San Diego (Oceanside, CA)
- Distance from San Diego: 45 minutes
- Specialty: Ocean views, beach proximity
- Altitude: 13,000-18,000 feet
- Cost: $220-$350
- Best For: Scenic coastal jumping, first-timers
- Unique Feature: Land on Oceanside beach (tide dependent)
Skydive Sacramento (Lincoln, CA)
- Distance from Sacramento: 30 minutes
- Specialty: Sierra Nevada views, consistent weather
- Altitude: 13,000 feet
- Cost: $190-$260
- Best For: Northern California residents, good value
- Unique Feature: Views of Folsom Lake and Sierra foothills
Pacific Northwest Highlights:
Skydive Oregon (Molalla, OR)
- Mount Hood and Cascade Range views
- Smaller, personalized operation
- Cost: $220-$280
- Rain considerations (check weather closely)
Skydive Snohomish (Snohomish, WA)
- Puget Sound and Olympic Mountains visible
- Seattle area’s premier drop zone
- Cost: $230-$290
- Summer jumping optimal
West Coast Seasonal Considerations:
- Best Months: May through October
- Weather Reliability: 75-85% completion rates during peak season
- Winter Jumping: Possible but more weather-dependent
- Marine Layer: Morning fog can delay jumps in coastal areas
Southwest: Arizona, Nevada, New Mexico
Desert landscapes provide exceptional visibility and extremely consistent jumping conditions.
Top Southwest Drop Zones:
Skydive Arizona (Eloy, AZ)
- One of America’s Premier Facilities
- Distance from Phoenix: 60 minutes
- Specialty: Competition training, large events, world records
- Altitude: 13,000 feet
- Cost: $200-$260
- Best For: Serious skydivers, consistent conditions
- Unique Feature: Multiple aircraft, massive landing area, top-tier instructors
Skydive Arizona is considered by many professional skydivers to be the best drop zone in North America, with nearly 300 jumpable days per year.
Skydive Las Vegas (Boulder City, NV)
- Distance from Las Vegas Strip: 30 minutes
- Specialty: Strip views, desert landscape
- Altitude: 15,000 feet
- Cost: $230-$300
- Best For: Tourists, bachelor/bachelorette parties
- Unique Feature: Vegas skyline visible from altitude
Skydive Albuquerque (Albuquerque, NM)
- Specialty: High altitude operations, mountain views
- Elevation: Drop zone at 5,000 feet elevation (jump altitudes adjusted accordingly)
- Cost: $220-$280
- Best For: Unique high-desert experience
Southwest Advantages:
- Weather Reliability: 85-95% completion rates
- Year-Round Jumping: Possible in Arizona and Nevada
- Visibility: Clear air often allows 50+ mile visibility
- Thermals: Afternoon heat can create turbulence (morning jumps recommended)
Rocky Mountains: Colorado, Utah, Montana
Mountain jumping provides spectacular alpine scenery and unique high-elevation experiences.
Top Mountain Region Drop Zones:
Mile-Hi Skydiving (Longmont, CO)
- Distance from Denver: 45 minutes
- Specialty: Rocky Mountain panoramas, Front Range views
- Altitude: 18,000 feet available
- Cost: $250-$350
- Best For: Mountain enthusiasts, spectacular scenery
- Unique Feature: Pikes Peak, Longs Peak, and entire Front Range visible
Skydive Moab (Moab, UT)
- Specialty: Red rock canyons, Arches and Canyonlands views
- Altitude: 13,000 feet
- Cost: $260-$320
- Best For: Bucket-list scenery, photographers
- Unique Feature: Most dramatic geological scenery in American skydiving
Mountain Region Considerations:
- High Elevation: Drop zones often at 4,000-6,000 feet elevation (affects performance)
- Weather Windows: Spring and fall can have limited jumping days
- Best Season: June through September
- Temperature Swings: Can be 40-50°F colder at altitude
Midwest: Illinois, Ohio, Michigan, Wisconsin
Midwest facilities offer excellent value, friendly culture, and consistent summer jumping.
Top Midwest Drop Zones:
Chicagoland Skydiving Center (Rochelle, IL)
- Distance from Chicago: 90 minutes
- Specialty: Great Lakes views, professional operation
- Altitude: 14,000 feet
- Cost: $200-$260
- Best For: Urban Chicago residents, good value
Start Skydiving (Middletown, OH)
- Distance from Cincinnati: 45 minutes
- Specialty: Large operation, excellent training programs
- Altitude: 13,500 feet
- Cost: $190-$250
- Best For: AFF progression, student-friendly
Skydive Chicago (Ottawa, IL)
- One of America’s Most Active Drop Zones
- Distance from Chicago: 90 minutes
- Specialty: Competition training, large events
- Altitude: 14,000 feet
- Cost: $220-$280
- Best For: Serious progression, experienced jumpers
Midwest Characteristics:
- Affordability: Generally 10-15% below coastal pricing
- Community: Friendly, welcoming culture
- Weather: Summer-focused (May-September optimal)
- Flat Terrain: Makes landing easier for first-timers
Southeast: Florida, Georgia, Carolinas
The Southeast offers year-round jumping with coastal and inland options.
Top Southeast Drop Zones:
Skydive Sebastian (Sebastian, FL)
- Distance from Orlando: 90 minutes
- Specialty: Atlantic Ocean views, beach proximity
- Altitude: 14,000 feet
- Cost: $220-$280
- Best For: Coastal jumping, warm weather
Skydive Deland (Deland, FL)
- Central Florida’s Premier Facility
- Distance from Orlando: 45 minutes
- Specialty: Year-round operations, extensive training programs
- Altitude: 14,000 feet
- Cost: $210-$270
- Best For: Winter jumping, serious progression
Skydive Carolina (Chester, SC)
- Distance from Charlotte: 60 minutes
- Specialty: Friendly atmosphere, consistent operations
- Altitude: 13,500 feet
- Cost: $200-$260
- Best For: First-timers, Carolina residents
Southeast Advantages:
- Year-Round Operations: Especially Florida
- Warm Landings: Rarely need heavy gear
- Tourist Infrastructure: Easy to combine with vacations
- Hurricane Season: July-October can bring weather interruptions
Northeast: New York, Pennsylvania, New Jersey
Northeast facilities serve dense populations with accessible locations and professional operations.
Top Northeast Drop Zones:
Skydive Long Island (Calverton, NY)
- Distance from NYC: 90 minutes
- Specialty: Ocean and Long Island Sound views
- Altitude: 13,500 feet
- Cost: $230-$290
- Best For: NYC metro area residents
Skydive Cross Keys (Williamstown, NJ)
- Distance from Philadelphia: 45 minutes
- Specialty: Large, modern facility
- Altitude: 13,000 feet
- Cost: $220-$280
- Best For: Philly and South Jersey residents
Skydive the Ranch (Gardiner, NY)
- Distance from NYC: 90 minutes
- Specialty: Hudson Valley views, professional operation
- Altitude: 13,500 feet
- Cost: $240-$300
- Best For: Scenic jumping, experienced jumpers
Northeast Considerations:
- Seasonal Operations: Many close November-March
- Weather Dependency: 60-70% completion rates due to variable weather
- Urban Proximity: Easy access from major metro areas
- Premium Pricing: 10-20% above national average
Texas and South Central
Texas’s size means diverse options from coastal to desert jumping.
Top Texas Drop Zones:
Spaceland Houston (Rosharon, TX)
- Distance from Houston: 45 minutes
- Specialty: Large facility, frequent jumpers
- Altitude: 14,000 feet
- Cost: $190-$250
- Best For: Houston metro residents, good value
Spaceland Dallas (Whitewright, TX)
- Distance from Dallas: 90 minutes
- Specialty: Professional operation, consistent service
- Altitude: 14,000 feet
- Cost: $190-$250
- Best For: DFW residents
Skydive San Marcos (Fentress, TX)
- Distance from Austin/San Antonio: 45 minutes
- Specialty: Hill Country views, central location
- Altitude: 14,000 feet
- Cost: $200-$260
- Best For: Central Texas, Austin residents
Texas Advantages:
- Long Season: February through November
- Value Pricing: Below national average
- Large Facilities: Well-equipped operations
- Summer Heat: Can be intense (100°F+ common)
Essential Gear and Equipment Recommendations
While tandem jumping requires no personal equipment, certain items enhance your experience and comfort.
What the Drop Zone Provides
Included Equipment:
- Tandem parachute system (main and reserve)
- Harness and attachment hardware
- Jumpsuit (windproof outer layer)
- Goggles
- Altimeter (for instructor reference)
- Communication devices (instructor to ground)
All technical equipment is professionally maintained, regularly inspected, and certified safe. You don’t need to understand how it works—your instructor manages everything.
Recommended Personal Items
Eyewear Solutions:
If you wear prescription glasses or contacts, you’ll need special considerations:
For Glasses Wearers:
- Wear your normal glasses (will fit under goggles)
- Secure with sports strap: Croakies Eyewear Retainer
- Some facilities provide prescription goggles—call ahead
For Contact Lens Wearers:
- Contacts work better than glasses for skydiving
- Close your eyes during initial exit (first 2-3 seconds)
- Consider: Dailies Total1 Contact Lenses for single-day use
Ideal Clothing:
Upper Body:
- Long-sleeve athletic shirt or light jacket
- Avoid loose or baggy clothing
- No hoodies with loose drawstrings
- Compression shirts work excellently
Lower Body:
- Athletic pants or jeans (not too loose)
- Leggings work well for women
- Avoid cargo pants with excessive pockets
Footwear:
- Lace-up athletic shoes (running shoes ideal)
- Boots acceptable if lace-up and not too heavy
- No: sandals, flip-flops, slip-ons, or high-tops
Recommended Athletic Wear: Check out the Under Armour Compression Set which provides ideal fit and comfort for skydiving without excess fabric.
Weather Protection
Cold Weather Jumping:
If jumping in temperatures below 60°F, consider:
- Thermal base layers: ColdPruf Base Layer Set
- Thin gloves: Facility often provides or: Mechanix Work Gloves
- Neck gaiter: Buff Original Neck Gaiter
Temperature at 14,000 feet averages 30-40°F colder than ground level. If it’s 70°F on the ground, expect 30-40°F at altitude.
Sun Protection:
Crucial for multi-hour waits at drop zones:
- High SPF sunscreen: Reapply every 2 hours
- Sunglasses: For ground waiting (not for jumping)
- Hat: For waiting between jumps (remove before jumping)
Recommended Sun Protection: Neutrogena Ultra Sheer SPF 70 provides excellent protection without interfering with goggles or equipment.
Capturing Your Experience (If Not Purchasing Video)
While professional video packages are recommended, some people want personal documentation:
Pre-Jump and Post-Jump Photos:
- Bring smartphone or camera for ground photos
- Have friend capture your preparation and reaction
- Many drop zones have photo-friendly areas
- Get photos with your instructor
GoPro and Action Cameras: Drop zones universally prohibit personal cameras during tandem jumps for safety reasons. Equipment could entangle with parachute systems or distract instructors. Professional videographers undergo special training for safe camera flying.
After Certification: Once you earn your skydiving license, personal cameras become options:
- GoPro HERO12 Black
- Insta360 ONE RS
- Require additional camera-flying training and minimum jump numbers
Comfort Items for Long Wait Times
Drop zones operate on weather-dependent schedules, meaning potential waits:
Recommended Waiting Comfort:
- Portable phone charger: Anker PowerCore 20,000mAh
- Water bottle: Stay hydrated during waits
- Snacks: Energy bars or light food
- Light reading or entertainment
- Folding chair: Some drop zones lack abundant seating
Post-Jump Recovery Items
After Landing Comfort:
- Ibuprofen or aspirin: Mild muscle soreness common
- Electrolyte drink: Replenish after adrenaline surge
- Change of clothes: Ground clothes may be sweaty from nerves
- Comfortable shoes: For walking around post-jump
If You Continue Skydiving: Initial Gear Investments
Once you decide to pursue certification, prioritize these purchases:
First Personal Gear (Priority Order):
- Altimeter ($200-$400):
- L&B Viso II+ Digital Altimeter
- Essential safety equipment
- Required for AFF progression
- Helmet ($200-$400):
- Cookie G4 Composite Helmet
- Protection and camera mounts
- Personal fit matters
- Jumpsuit ($150-$300):
- Bev Suits Custom Jumpsuit
- Improved aerodynamics
- Professional appearance
- Audible Altimeter ($150-$250):
- L&B Optima 2 Audible
- Audio altitude warnings
- Backup to visual altimeter
Do NOT Buy Initially:
- Complete parachute rigs (wait until after A-License minimum)
- Automatic activation devices (included in rental rigs)
- Advanced suits or wingsuits
Total investment for first-year personal gear: $700-$1,400. Parachute systems cost $5,000-$12,000 and should only be purchased after significant experience and expert consultation.
Storage and Transport
Gear Bag Recommendations:
If accumulating personal equipment:
- Pelican 1510 Carry-On Case – Ultimate protection
- North Face Base Camp Duffel Large – More affordable option
Safety Equipment You Should Never Skimp On
If you continue jumping and purchase personal gear:
Non-Negotiable Quality:
- AAD (Automatic Activation Device): Only buy new from certified dealers
- Reserve parachute: Professional packing and regular maintenance required
- Main parachute: Thoroughly inspected by rigger before purchase
Trusted Manufacturers:
- Parachute systems: PD, Aerodyne, NZ Aerosports
- AADs: Cypres, Vigil
- Altimeters: L&B, Alti-2
Never buy critical safety equipment from unauthorized sources or without professional consultation from experienced riggers or instructors.
Safety Standards and What to Verify Before Booking
Understanding safety protocols helps you choose reputable facilities and feel confident in your decision to jump.
USPA Certification: Your Primary Safety Filter
The United States Parachute Association (USPA) maintains the nation’s primary skydiving safety standards and certification program.
What USPA Certification Means:
- Drop zone meets or exceeds minimum safety standards
- Instructors hold current certifications and ratings
- Equipment maintenance follows specified schedules
- Insurance coverage requirements met
- Safety and training manuals in use
- Incident reporting and investigation protocols
How to Verify USPA Membership:
- Check the drop zone’s website for USPA member logo
- Search USPA.org’s Drop Zone Directory
- Call and ask for their USPA Group Member number
- Verify instructor ratings before your jump
Non-USPA Facilities: While some legitimate operations exist outside USPA membership, beginners should strongly prefer USPA-certified facilities. Non-member operations may lack standardized safety protocols, adequate insurance, or proper instructor training.
Instructor Certifications to Look For
Your tandem instructor’s qualifications directly impact your safety and experience quality.
Tandem Instructor Ratings:
USPA Tandem Instructor (Minimum Requirement):
- 500 jumps minimum before training
- 3-year experience requirement
- Written and practical examinations
- Regular recertency requirements
- Currency requirements (recent jumps)
Tandem Examiner (Higher Qualification):
- Can train and certify other tandem instructors
- 1,000+ jumps typically
- Extensive experience and teaching ability
Additional Instructor Qualifications:
- AFF Instructor: Can teach solo progression
- Coach: Can provide post-license skill training
- Safety & Training Advisor: Drop zone safety expert
What to Ask:
- “How many jumps does my instructor have?”
- “How long have they been instructing?”
- “What certifications do they hold?”
Quality instructors average 2,000-10,000+ total jumps and hundreds of tandem students.
Equipment Standards and Maintenance
Understanding equipment basics helps you recognize quality operations.
Tandem Parachute Systems:
Modern tandem equipment includes multiple redundant safety features:
Primary Components:
- Main Parachute: 330-380 sq ft (sized for two people)
- Reserve Parachute: Same size, professionally packed, regularly inspected
- AAD (Automatic Activation Device): Activates reserve if altitude/speed thresholds crossed
- Drogue Parachute: Stabilizes freefall and controls descent rate
Maintenance Standards:
- Reserve parachute: Professionally repacked every 180 days (FAA requirement)
- Main parachute: Inspected after each jump, repacked between uses
- AAD: Manufacturer service intervals (typically 4 years)
- Harness and hardware: Regular inspection per manufacturer specifications
What to Observe:
- Equipment appears well-maintained and clean
- Packing area is organized and professional
- Parachutes are packed systematically
- Manifest system tracks equipment maintenance
Safety Records and Statistics
National Safety Statistics (2025 USPA Data):
- Total U.S. jumps: 3.6 million
- Fatalities: 19
- Fatality rate: 0.53 per 100,000 jumps
- Tandem fatality rate: Even lower (approximately 0.15 per 100,000)
Historical Perspective: Skydiving has become progressively safer over decades:
- 1970s: 3-4 fatalities per 100,000 jumps
- 1990s: 2-3 fatalities per 100,000 jumps
- 2000s: 1-2 fatalities per 100,000 jumps
- 2020s: 0.5-0.7 fatalities per 100,000 jumps
Tandem Skydiving Specifics: Tandem jumping is the safest form of skydiving:
- Approximately one tandem fatality per 500,000 tandem jumps
- Most tandem incidents involve instructor error, not equipment failure
- Reserve parachute deployment success rate: 99.9%+
Comparing Risk Levels: Per 100,000 exposures:
- Skydiving: 0.53 fatalities
- Driving: 1.3 fatalities (per 100 million miles)
- Bicycling: 2.1 fatalities
- Horseback riding: 6.5 fatalities
Pre-Jump Safety Briefing Red Flags
During your ground school, watch for these warning signs:
Positive Safety Indicators:
- Instructor explains every step clearly
- Emergency procedures covered thoroughly
- Opportunity to ask unlimited questions
- Practice sessions for body position and landing
- Equipment check performed in front of you
- Professional, focused atmosphere
Red Flags (Consider Different Facility):
- Rushed or abbreviated training
- Instructor seems distracted or unprofessional
- Equipment appears worn or poorly maintained
- Questions dismissed or minimized
- Pressure to purchase add-ons
- Cavalier attitude toward safety
Trust your instincts. If something feels wrong, it’s okay to postpone or cancel.
Weather and Operational Limits
Reputable facilities maintain strict weather minimums:
Standard Weather Limits:
- Wind speed: Maximum 20 mph (varies by student experience level)
- Cloud ceiling: Minimum 3,500 feet
- Visibility: Minimum 3 miles
- Precipitation: No jumping in rain
- Lightning: No jumping within 10+ miles of storm activity
Why These Limits Matter:
- High winds increase landing difficulty and injury risk
- Low clouds reduce visual references for navigation
- Precipitation affects parachute performance
- Lightning poses obvious danger to aircraft
Red Flag: Facilities that push weather limits or jump in marginal conditions prioritize revenue over safety.
Insurance and Liability
What Drop Zones Must Carry:
- General liability insurance
- Aircraft insurance
- Workers compensation (for employees)
- Equipment insurance
What You Sign: Liability waivers acknowledge inherent risks and typically limit facility liability. These are legally enforceable but don’t waive gross negligence.
Personal Insurance Considerations:
- Health insurance: Verify your policy covers skydiving injuries (most do)
- Life insurance: Check for exclusions (rare but possible)
- Travel insurance: May include adventure sports coverage
Emergency Procedures and Backup Systems
Understanding backup systems provides peace of mind:
Primary Safety Systems:
- Dual Parachute System:
- Main parachute (primary)
- Reserve parachute (backup) – professionally packed, never used for regular jumping
- Automatic Activation Device (AAD):
- Electronic computer monitors altitude and descent rate
- Automatically activates reserve if limits exceeded
- Functions even if instructor is incapacitated
- Success rate: 99.9%+
- Reserve Static Line (RSL):
- Mechanical system that initiates reserve deployment if main malfunctions
- Activates during main parachute cutaway
- Provides redundancy to manual activation
Malfunction Statistics:
- Main parachute malfunctions: 1 in 1,000-1,500 jumps
- Reserve deployment required: 1 in 1,000 jumps
- Reserve malfunction: 1 in 10,000+ jumps
- Total system failure (main AND reserve): Extremely rare (1 in millions)
Questions to Ask Before Booking
Essential Pre-Booking Questions:
- “Are you a USPA Group Member?” (Answer should be yes)
- “What certifications do your tandem instructors hold?”
- “How many jumps does my instructor have?”
- “What type of parachute systems do you use?”
- “When was your reserve parachute last repacked?”
- “What are your weather minimums?”
- “What’s your refund/reschedule policy for weather cancellations?”
- “Do you carry liability insurance?”
Optional but Helpful Questions: 9. “How long has this facility been operating?” 10. “What’s your annual jump volume?” 11. “Do you use AADs on all student equipment?” (Should be yes) 12. “What happens if I need to cancel?”
Medical Considerations and Restrictions
Automatic Disqualifications:
- Pregnancy (any stage)
- Recent surgery (within 6-12 months depending on procedure)
- Unstable heart conditions
- Uncontrolled epilepsy
- Diabetes requiring insulin (some facilities allow with medical clearance)
Weight Restrictions:
- Most facilities: 200-240 lbs maximum
- Some facilities: Up to 260 lbs with premium fees
- BMI may be factor in addition to weight
- Determined by parachute engineering, not discrimination
Age Restrictions:
- Minimum: 16-18 (varies by state)
- 16-17 requires parental consent
- Maximum: None (many 80+ year-olds jump successfully)
- Senior jumpers may need medical clearance
Medications: Inform your instructor of any medications, particularly:
- Blood thinners
- Anxiety medications
- Blood pressure medications
- Any medication affecting alertness
When Medical Clearance Required:
- Age 60+ (some facilities)
- Known medical conditions
- Recent injuries or surgeries
- Medications that affect consciousness
Recommended Health & Fitness Tracker: The Fitbit Charge 6 helps you monitor heart rate and general fitness as you prepare for your jump.
What to Do If You Witness Safety Concerns
If you observe safety violations or concerning practices:
- Document: Take notes, photos (if possible without interfering)
- Report to USPA: Online incident reporting at USPA.org
- Report to FAA: For serious violations involving aircraft
- Leave Reviews: Warn other potential customers
- Choose Different Facility: Your safety isn’t worth the risk
USPA Safety Reporting: Email: [safety@uspa.org] Phone: (540) 604-9740
The skydiving community takes safety extremely seriously. Reporting concerns helps maintain industry standards and protects future jumpers.

Booking Your Jump: Insider Tips and Best Practices
Strategic booking improves your experience, maximizes value, and increases completion likelihood.
Best Times to Schedule Your Jump
Optimal Booking Windows:
Time of Day:
- Early Morning (7-10am): Best weather stability, calmest winds, highest completion rates
- Mid-Morning (10am-12pm): Still good conditions, moderate traffic
- Afternoon (12-4pm): Higher winds possible, thermal activity increases
- Evening (4-7pm): Can be excellent but limited by daylight
Day of Week:
- Weekdays (Mon-Thu): Less crowded, more instructor attention, often discounted
- Friday: Moderate crowds, pre-weekend energy
- Saturday: Busiest day, longer waits, full energy atmosphere
- Sunday: Busy but slightly less than Saturday
Month/Season:
| Season | Pros | Cons | Completion Rate |
|---|---|---|---|
| Spring (Mar-May) | Moderate temperatures, beautiful landscapes | Variable weather, wind | 65-75% |
| Summer (Jun-Aug) | Long days, best weather windows | Crowded, hot, afternoon thunderstorms | 80-90% |
| Fall (Sep-Nov) | Excellent visibility, comfortable temps, fall colors | Shorter days, increasing weather variability | 70-80% |
| Winter (Dec-Feb) | Uncrowded, crisp visibility | Cold, limited daylight, many facilities closed | 60-70% |
Peak vs. Off-Peak Advantages:
Peak Season (May-September):
- Pros: Best weather reliability, full operations
- Cons: Crowded, premium pricing, longer waits
- Book: 2-4 weeks in advance
Off-Peak (October-April):
- Pros: Discounts available, personalized attention, uncrowded
- Cons: Weather more variable, some facilities closed
- Book: 1-2 weeks sufficient
How Far in Advance to Book
General Guidelines:
First-Time Tandem Jump:
- Peak season weekends: 3-4 weeks ahead
- Peak season weekdays: 1-2 weeks ahead
- Off-season: 5-7 days ahead
- Last-minute (1-3 days): Possible but limited time selection
Group Bookings (4+ People):
- Minimum 4 weeks advance notice
- 6-8 weeks for groups over 10
- Coordinate with facility for logistics
Special Occasions:
- Birthday jumps: 4-6 weeks ahead
- Bachelor/Bachelorette: 4-8 weeks ahead
- Corporate events: 8-12 weeks ahead
Walk-Ins: Many facilities accept same-day walk-ins if capacity allows, but this:
- Limits time slot selection
- May result in long waits
- Doesn’t guarantee jumping
- Rarely gets best instructors (already assigned)
Finding Deals and Discounts
Where to Find Savings:
Direct from Drop Zone:
- Sign up for email lists (exclusive promotions)
- Follow social media (flash sales, last-minute deals)
- Call during slow periods for negotiation
- Ask about military, student, first responder discounts
Third-Party Platforms:
- Groupon: Occasional 15-30% discounts (verify USPA certification)
- LivingSocial: Similar to Groupon
- Gift certificate sites: Sometimes discounted
Group Booking Discounts: Already covered in cost section, but worth emphasizing:
- 2-3 people: 5% discount
- 4-6 people: 10% discount
- 7-10 people: 15% discount
- 11+ people: 15-20% discount plus coordination assistance
Seasonal Promotions:
- Black Friday/Cyber Monday: Gift certificate sales
- January-February: Slow season discounts
- Birthday month: Some facilities offer birthday discounts
- Anniversary events: Drop zone celebrating milestones
Package Deals: Some facilities bundle services:
- Jump + Video + T-shirt packages
- Multiple jump discounts
- Jump + accommodation (destination drop zones)
Credit Card Rewards: Use travel rewards credit cards:
- Chase Sapphire Reserve: 3x points on travel
- Amex Platinum: 5x points on flights (if booked through portal)
- Bank rewards portals sometimes categorize skydiving as travel
Recommended Travel Card: Chase Sapphire Preferred Credit Card offers excellent travel rewards including adventure activities.
Gift Certificates for Others
Skydiving gift certificates rank among the most memorable gifts:
Purchasing Gift Certificates:
- Buy directly from specific drop zones
- National providers like SkyDive.com offer multi-location certificates
- Verify no expiration dates or transfer restrictions
- Include video package in gift for added value
Gift Presentation Ideas:
- Surprise reveal with custom certificate holder
- Accompany with skydiving-themed items
- Pair with GoPro if recipient will continue jumping
- Frame certificate with inspirational skydiving photos
Ideal Gift Occasions:
- Milestone birthdays (18th, 21st, 30th, 40th, etc.)
- Graduations
- Bucket list gifts
- Anniversary presents
- “Experience” gifting for minimalists
Gift Certificate Recommendations: Skydiving Gift Certificate Holder (Custom) makes an impressive presentation.
Booking for Groups and Special Events
Bachelor/Bachelorette Parties:
Skydiving bachelor/bachelorette parties have surged in popularity:
Coordination Tips:
- Contact drop zone 6-8 weeks ahead
- Confirm all participants meet requirements
- Expect 20-30% potential no-shows (have backup activities)
- Consider split groups (jumpers vs. supporters)
- Book morning for evening celebrations
Typical Group Size:
- 4-8 people: Manageable and intimate
- 8-12 people: Requires coordination but doable
- 12+ people: Consider splitting across multiple time slots
Corporate Team Building:
Skydiving offers powerful team-building experiences:
What Drop Zones Offer:
- Customized scheduling
- Team debriefs and group discussions
- Certificates and recognition
- Optional video compilation
- Catering coordination (some facilities)
Cost Considerations:
- Group rates apply (15-20% off for 10+ people)
- May require deposit
- Consider all-inclusive packages
Birthday Jumps:
Many people celebrate milestone birthdays with airplane jumping:
Making It Special:
- Request specific instructor if possible
- Add surprise elements (coordination with drop zone)
- Arrange for friends/family to watch
- Purchase premium video package
- Bring birthday decorations for ground celebration
Weather Contingency Planning
Weather cancellations frustrate many first-time jumpers. Smart planning minimizes disappointment:
Build Flexibility:
- Schedule 2-3 potential jump days if traveling
- Book early morning for best conditions
- Monitor weather forecasts week ahead
- Accept that cancellations protect your safety
Cancellation Policies:
Standard Drop Zone Policies:
- Weather cancellations: Full refund or reschedule (no penalty)
- Personal cancellations <24 hours: Forfeit deposit (typically $50-$100)
- Personal cancellations >24 hours: Full refund or transfer
- No-shows: Forfeit entire payment
Best Practices:
- Call drop zone morning-of even if you received confirmation
- Check their social media for real-time updates
- Have backup activity plans
- Don’t schedule critical evening events same day
Travel Insurance:
If traveling significant distance:
- Purchase trip insurance covering adventure sports
- Ensure policy covers non-refundable expenses
- Document weather cancellation if claiming insurance
Recommended Travel Insurance: World Nomads Adventure Travel Insurance specifically covers adventure activities including skydiving.
What to Bring vs. What to Leave Home
Definitely Bring:
- Valid government ID (driver’s license or passport)
- Credit card or cash for add-ons
- Appropriate clothing (covered in gear section)
- Athletic lace-up shoes
- Water and light snacks
- Phone (for post-jump photos/celebration)
- Prescription glasses if needed (with sports strap)
- Sunscreen and sunglasses (for waiting)
Leave at Home or in Car:
- Valuable jewelry
- Expensive watches
- Wallet contents you don’t need
- Excessive cash
- Work stress and concerns
Vehicle Security: Drop zones typically have secure parking, but use judgment about leaving valuables visible in vehicle.
Preparing Friends and Family
For Supporters Watching: Most drop zones welcome spectators:
Spectator Information:
- Free to watch (no admission)
- Landing areas typically accessible
- Bring: chairs, water, sunscreen, snacks
- Photography encouraged
- Plan 2-4 hour time commitment
- Weather affects them too
Making It Special:
- Surprise revelation (record their reaction)
- Celebration immediately after landing
- Coordinate with drop zone for special accommodations
- Bring celebratory items (signs, etc.)
Technical Booking Platforms
Booking Directly vs. Through Aggregators:
Direct Booking Advantages:
- Best prices (no middleman fees)
- Direct communication with facility
- Easier modifications or cancellations
- Build relationship with drop zone
Aggregator Booking:
- Compare multiple facilities easily
- Sometimes exclusive deals
- Convenient gift certificate options
- May include additional fees
Recommended Approach: Research on aggregators, book directly with facility.
Managing Expectations
Reality vs. Expectations:
Common Misconceptions:
- “I’ll feel like I’m falling” → Actually feels like floating/flying
- “I’ll be terrified the entire time” → Most fear is before exit; freefall is euphoric
- “It takes all day” → Typically 2-4 hours total
- “Weather rarely cancels” → Weather cancels 15-30% depending on location/season
- “Anyone can do it” → Weight, health restrictions apply
Setting Realistic Expectations:
- Waiting time varies (bring entertainment)
- Photography may not capture intensity of experience
- Some people feel underwhelmed if expectations too high
- Physical sensations differ from expectations
Post-Booking: The Days Before Your Jump
Mental Preparation:
- Watch YouTube videos of tandems (reduces fear of unknown)
- Avoid excessive research about accidents (causes unnecessary anxiety)
- Talk to people who’ve jumped before
- Visualize successful, enjoyable experience
- Accept some nervousness is normal and healthy
Physical Preparation:
- Get good sleep night before
- Stay hydrated 24 hours prior
- Eat normal meals (don’t jump hungry)
- Avoid alcohol 24 hours before
- Don’t party late the night before
Practical Preparation:
- Verify booking confirmation
- Check weather forecast (don’t obsess)
- Charge phone and camera batteries
- Gas up vehicle for early departure
- Set multiple alarms for morning jumps
Recommended Preparation Reading: The Skydiver’s Handbook by Dan Poynter offers excellent context for understanding the sport, though it’s more detailed than necessary for single tandem jumps.
Day-Of Success Tips
Morning of Your Jump:
- Eat a normal breakfast 2 hours before arrival
- Double-check requirements (ID, appropriate clothes)
- Arrive 30 minutes early (reduces stress)
- Use restroom before gear-up (you won’t want to once harnessed)
- Stay off your phone during training (focus completely)
- Ask all questions during ground school
- Trust your instructor and training
- Remember: over 3 million people jump successfully each year

Frequently Asked Questions
Q: How do I find airplane jumping facilities near my location?
A: Start with the USPA Drop Zone Locator at USPA.org, which shows all certified facilities searchable by city, state, or zip code. Google Maps searching “airplane jumping near me” or “skydiving near me” provides visual location results. Cross-reference Google results with the USPA directory to ensure facilities are currently certified. Most Americans live within 100 miles of a USPA-certified drop zone, with major metropolitan areas typically having multiple options within 50-75 miles.
Q: How much does airplane jumping cost for first-timers?
A: First-time tandem skydiving costs $200-$350 depending on location, altitude, and included features. Standard 13,000-14,000 foot jumps average $240-$280 nationally, while premium 18,000-foot jumps run $290-$350. Video packages add $100-$150, and altitude upgrades cost $50-$75. Coastal states (California, New York, Florida) typically run 10-20% above national averages, while Midwest and South Central states offer better value. Group discounts of 5-20% apply for 2+ people booking together.
Q: Is airplane jumping safe for beginners?
A: Modern tandem skydiving is extremely safe, with a fatality rate of approximately 0.15 per 100,000 tandem jumps—making it statistically safer than horseback riding, bicycling, or driving equivalent distances. USPA-certified facilities follow strict safety protocols, use dual parachute systems with automatic activation devices, and employ professionally trained instructors with hundreds to thousands of jumps. In 2025, over 3.6 million jumps occurred in the United States with 19 total fatalities across all skydiving categories, and tandem skydiving had even better safety statistics. The sport has become progressively safer over decades due to improved equipment, training standards, and technology.
Q: What weather conditions cancel airplane jumping?
A: Skydiving facilities maintain strict weather minimums for safety. Typical cancellation conditions include wind speeds exceeding 20 mph, cloud ceilings below 3,500 feet, visibility under 3 miles, any precipitation, or lightning within 10+ miles. Weather cancellation rates vary by location and season: Arizona and Nevada see 85-95% completion rates, California and Midwest 75-85%, mountain regions 60-75%, and Northeast 60-70%. Weather cancellations result in full refunds or free rescheduling. Book early morning jumps for best weather reliability, and build 2-3 potential jump days into your schedule if traveling specifically for skydiving.
Q: What are the weight limits for airplane jumping?
A: Most facilities set tandem weight limits at 220-240 lbs, with some accepting up to 260 lbs with additional fees ($50-$100). Limits exist due to parachute engineering—equipment is rated for specific maximum weights to ensure safe deployment and landing. Some facilities also consider BMI and weight distribution in addition to total weight. Be honest about your weight when booking, as surprises at check-in can result in cancellations with deposit forfeiture. If you’re close to the limit, call facilities directly—some have specialized equipment for heavier participants.
Q: How long does the entire airplane jumping experience take?
A: Plan 3-4 hours total from arrival to completion. Typical timeline: 30 minutes for check-in and paperwork, 20-30 minutes for ground training, 15-20 minutes for gear-up and instructor introduction, 20-25 minutes for aircraft climb to altitude, 45-60 seconds of freefall, 5-7 minutes under parachute, and 30-45 minutes post-jump for video review and debriefing. Busy weekend days can extend total time to 4-6 hours due to weather delays or multiple aircraft loads ahead of you. Bring water, snacks, and entertainment for potential waiting periods.
Q: Can I bring my own GoPro camera on the jump?
A: No. Drop zones universally prohibit personal cameras during tandem jumps for critical safety reasons. Cameras could entangle with parachute systems, distract instructors managing your safety, or cause injury during landing. Professional skydiving videographers undergo specialized training for safe camera flying and use equipment designed specifically for jumping. After you earn your solo skydiving license (A-License), personal cameras become options, but even then require additional training and minimum jump experience (typically 200+ jumps). Purchase the facility’s video package—professionals capture better footage anyway.
Q: What should I wear for my first airplane jump?
A: Wear comfortable athletic clothing appropriate for the ground temperature: long-sleeve shirt, athletic pants or jeans (not baggy), and lace-up athletic shoes (running shoes ideal). Avoid loose clothing, hoodies with drawstrings, sandals, slip-on shoes, or excessive jewelry. Temperature at jump altitude averages 30-40°F colder than ground level, but facilities provide jumpsuits for wind protection and warmth. Remove all jewelry before jumping. Long hair should be tied back. Prescription glasses are fine (wear with sports strap), and contacts work even better. Bring sunscreen and sunglasses for ground waiting.
Q: How old do I need to be to go airplane jumping?
A: Minimum age is 18 in most states, though some allow 16-17 with parental consent and guardian presence. There is no upper age limit—people in their 70s, 80s, and even 90s jump successfully. Some facilities require medical clearance for participants over 60-65 years old. Age itself rarely disqualifies people; health conditions and weight restrictions are more commonly limiting factors. If you’re a minor interested in jumping, research your specific state regulations and find facilities that work with younger jumpers in your area.
Q: What happens if I’m too scared to jump when we reach altitude?
A: You can absolutely refuse to jump at any point, including at the aircraft door. Ethical instructors will never force anyone to exit. However, refund policies vary: some facilities offer full refunds if you cancel before boarding the aircraft, partial refunds if you cancel in-flight before reaching the door, and no refunds if you cancel after the door opens. Interestingly, the fear often peaks before exit—90%+ of people who feel terrified at the door report that freefall itself is exhilarating rather than scary. If you’re on the fence, communicate with your instructor; they’re trained in anxiety management and can provide additional reassurance.
Q: Do I need any previous experience or training before my first jump?
A: No previous experience is required for tandem skydiving. The facility provides 20-30 minutes of ground training covering exit procedures, body position during freefall, parachute deployment expectations, and landing position. This brief training is sufficient because your instructor manages all technical aspects—you’re essentially a passenger securely attached to an expert. If you’re interested in learning to jump solo, Accelerated Freefall (AFF) programs teach independent skydiving through 7-25 progressive jumps with intensive training, but that’s not necessary for first-time tandem experiences.
Q: Can I eat before airplane jumping, or will I get sick?
A: Eat a normal meal 1-2 hours before your jump. Contrary to popular belief, jumping on an empty stomach increases nausea risk and can cause lightheadedness during freefall. Skydiving itself rarely causes motion sickness because there’s no frame of reference creating the sensation of movement—most people experience it as floating rather than falling. Avoid heavy, greasy meals immediately before jumping, but normal breakfast or lunch is recommended. Stay well-hydrated in the 24 hours before your jump. If you’re prone to motion sickness, consider preventative medication like Dramamine 30 minutes before arrival.
Q: What’s the difference between tandem and solo skydiving?
A: Tandem skydiving involves being harnessed to a certified instructor who manages all technical aspects of the jump—you’re essentially a passenger experiencing the thrill. Tandem requires only 20-30 minutes of training, allows same-day jumping, and costs $200-$350 per jump. Solo skydiving (after AFF certification) means you jump alone with your own parachute, making all decisions independently. Solo certification requires 25+ jumps, 6-8 hours of ground school, progressive skill development, written and practical exams, and costs $1,500-$3,000 total. After certification, solo jumping costs only $40-$60 per jump. Tandem is ideal for one-time experiences; AFF makes sense if you plan to jump regularly.
Q: How high do you jump from, and how long is the freefall?
A: Most first-time tandem jumps occur from 13,000-14,000 feet, providing 45-60 seconds of freefall before parachute deployment at 5,000-6,000 feet. Lower-cost options at 10,000 feet offer 30-35 seconds of freefall, while premium 18,000-foot jumps provide 60-70 seconds. After deployment, you’ll descend under parachute for 5-7 minutes before landing. During freefall, you’ll reach terminal velocity of approximately 120 mph within 10 seconds of exit. The total experience from exit to landing lasts 6-8 minutes, though most people report time distortion making freefall feel longer than actual duration.
Q: Will my ears pop during airplane jumping?
A: Ear pressure changes are usually minimal and less intense than commercial airline flights. Most people experience slight pressure equalization similar to driving through mountain elevations. If you have congestion, allergies, or sinus issues, they may cause discomfort during descent under parachute (not during freefall). Take decongestants before jumping if you’re prone to ear issues. Chewing gum during aircraft ascent helps equalize pressure. If you have severe ear problems, tubes in your ears, or recent ear surgery, consult your doctor before booking. The gradual descent under parachute allows plenty of time for natural pressure equalization.
Q: Can I go airplane jumping if I’m afraid of heights?
A: Surprisingly, many people with acrophobia (fear of heights) successfully skydive and report that the experience feels different from standing on high buildings or cliff edges. At 13,000+ feet, your brain doesn’t process the same fear response because there’s no immediate visual reference point for the height—you’re so high that everything below looks like a map. The sensation is more like floating in space than standing at a dangerous edge. That said, extreme acrophobia may still be challenging. Consider visiting an indoor skydiving wind tunnel first to test your comfort with the body-flight sensation without actual altitude. Approximately 60% of people who describe themselves as “afraid of heights” successfully complete and enjoy tandem skydives.
Conclusion
Finding airplane jumping near you opens the door to one of life’s most transformative experiences. Whether you’re searching for “airplane jumping near me” in California, Texas, Florida, or anywhere across America, the accessibility and safety of modern skydiving make it easier than ever to take that leap.
Key Takeaways:
- Start with USPA certification – Always verify facilities through USPA.org’s directory for safety assurance
- Budget realistically – Expect $240-$280 for standard tandem jumps, plus $100-$150 for video documentation
- Book strategically – Early morning weekday jumps offer best weather reliability and personalized attention
- Build flexibility – Weather impacts 15-30% of scheduled jumps; plan multiple potential dates
- Trust the process – Over 3.6 million successful jumps occur annually in the United States with excellent safety records
The journey from searching “airplane jumping near me” to actually standing at the aircraft door happens faster than you might imagine. Modern online booking, comprehensive safety protocols, and professional instruction mean that within weeks of deciding to jump, you could be freefalling at 120 mph with a smile on your face and a story that will last a lifetime.
Remember that your first tandem jump is just the beginning. Many people discover a passion for skydiving that leads to AFF certification, hundreds of jumps, and an entirely new community of adventure-focused friends. Others complete a single jump, check it off their bucket list, and carry the confidence boost and memory forever. Both paths are equally valuable.
As you move forward with booking your jump, prioritize safety over savings, choose facilities with strong reputations and certifications, invest in video documentation to capture the moment, and approach the experience with excitement rather than fear. The aviation and skydiving industry has spent decades refining equipment, training, and protocols to make airplane jumping accessible, safe, and unforgettable.
Your extraordinary aerial adventure awaits. Start by visiting the USPA Drop Zone Locator, comparing facilities in your area, reading reviews, and making that call. The hardest part isn’t the jump itself—it’s making the decision to book. Everything else flows naturally from there.